In this blog post will discuss everything you need to know as an Android app penetration tester. Whether you are a Bug bounty hunter, a working cyber security professional, or a random security researcher, this blog will surely benefit you.
I will simplify everything in this tutorial so that you do not struggle while setting up your Android Pentesting lab. I wish no one should face the same issues which I faced earlier. That's why I put my hard work here to give you a clear picture so you can start quickly.
Having a developer background, I Know how to build Android Mobile applications using Java, Kotlin, Flutter, and React Native. I am also good at Building web applications, having good knowledge of frontend and backend, along with OWASP knowledge for Both Web and Android apps. I will share my knowledge through this blog.
Without wasting your valuable time, let me tell you the resources and tools you should have before jumping into Android app pentesting. Also, there are some frequently asked questions you have to know.
Table of Contents
Frequently Asked Questions
Is Programming Knowledge required for Android Pentesting?
Sometimes Yes, having knowledge of Java helps you understand the application better
How much Java/Kotlin Knowledge is needed?
You don't have to be a super coder, but having basic knowledge of android app development is a plus
How much time will it take to learn Android Pentesting
It depends on you, and your past experience of Pentesting, Bug Bounty Knowledge
Setting up Android App Pentesting Environment
Required Tools
- Burp Suite
- VirtualBox
- Android Emulator
- ADB
- Jadx GUI
- Python
- apktool
- apkleaks
- Frida
- Objection
There are no limitations when it comes to pentesting tools, I personally use these tools, and there are some advanced tools, which we will discuss in another blog post.
Note:
If you try to Run Android Emulators inside Virtual machines, then it won't
work. When I was new to Android pen testing, I used to do the same but later
realised and Switched all my tools to my Primary machine.
Android app pentesting tools
Burp Suite
VirtualBox
Genymotion
Note:
You can use Android Studio for Android Emulators. If you use android
studio, then there is no need for Virtual Box software
Adb
Jadx GUI
apktool
apkleaks
Python
Frida
Frida tool/script is used for dynamic hooking so that we can test the application at the run time, overriding the functions,
You have to install the Frida server on your android emulator, and the Frida client on your machine
Frida on the local machine
if Python is installed on your local PC, then you can install frida by typing the following in a terminal
pip install frida-tools
you can check if frida is installed or not by typing
frida --version
Alternatively, you can use npm to install frida binaries. As a pentester, I hope everyone is familiar with Python
Frida server on Android Emulator
This is the frida server; you must download the frida server file according to your emulator's architecture.
After downloading the zip file, unzip it, and use adb shell to connect your android emulator
then go to the directory /data/local/tmp
push the frida-server there
adb push frida-server /data/local/tmp
Now
adb shell
then
cd tmp
since it is already an executable file, if not then you can make it executable by giving the permissions
chmod 777 frida-server
run the server
./frida-server
soon we will discuss how to use frida in depth
Objection
pip3 install objection
Objection on GitHub
How to intercept Android app traffic in Burp Suite
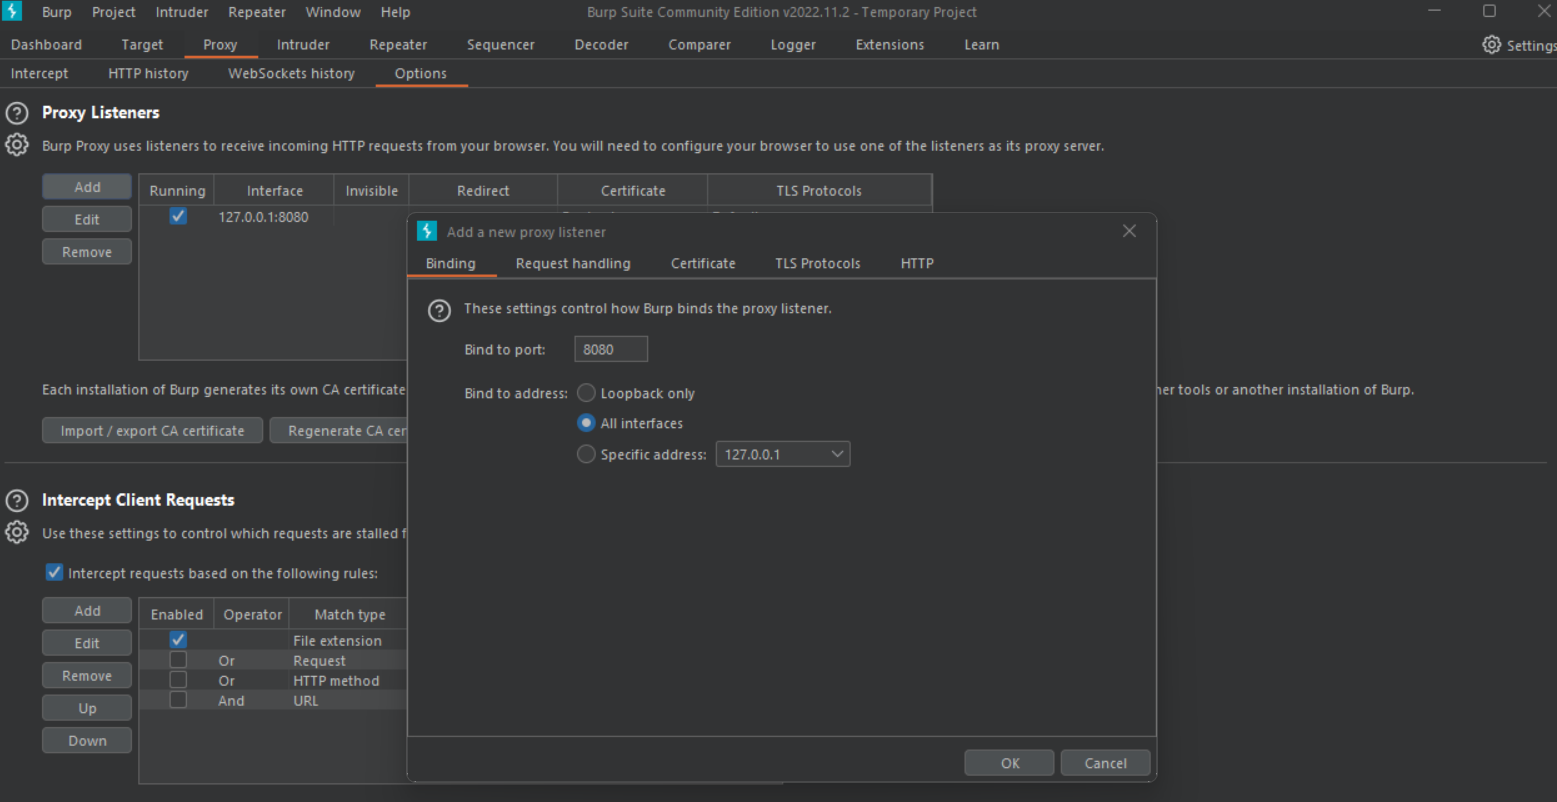
Configure Burp Suite Proxy
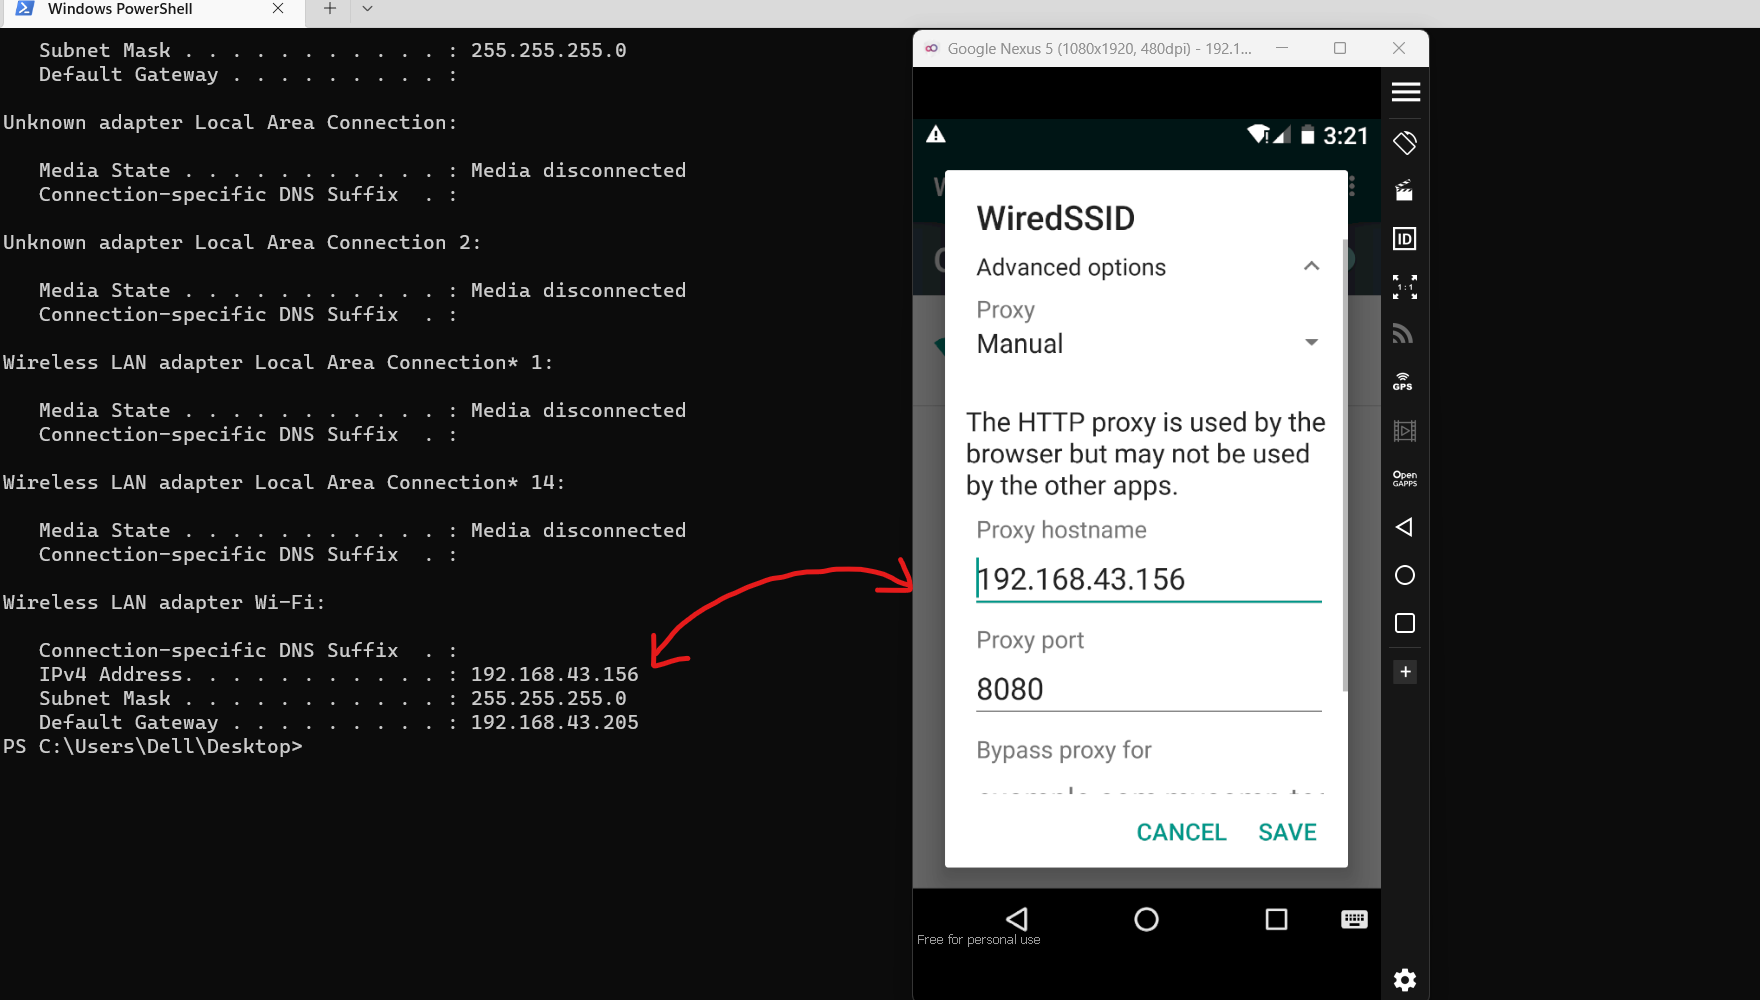
Configure Proxy settings on Android
To Find the IP address on your Local Machine
Open any terminal and type:
ipconfig
(or ifconfig for Linux)
Now Open Android Emulator's Wifi settings, and you will notice that the device is connected to a network, now long click or right-click on the network, and then you will see the options, click on Modify Network.
Now click Advanced, and configure the IP address and port.
Note:
For some emulators, there is another way to achieve this. In the emulator's
settings, you will find the settings to change the proxy settings of the
device
Configure CA certificate on up to Android 6
Now we have to configure a CA certificate
Open any Browser, visit htttp://burp
and download the file, rename the file cacert.der to cacert.cer
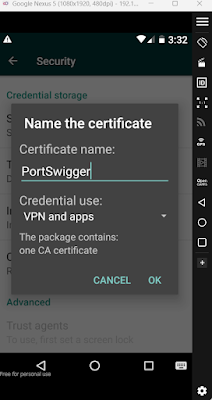
Now open Settings, then Security, then Install from SD Card.
Now Choose the file, and you are asked to enter a name for the certificate. You can give any name and then click Ok.
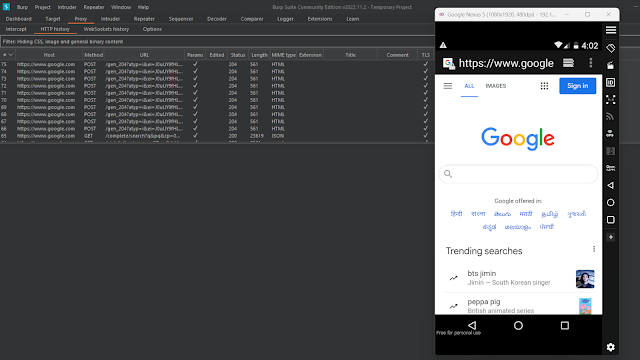
Now you are ready to intercept the traffic of your android emulator. Now open Burp suite, and you will see the traffic in the proxy section.
Installing CA cert on Android devices above Android 6
on android version 7, you need root access to install the CA certificate on your device,
if you are on Windows, then you need gitbash or WSL to continue
Download OpenSSL Installer for Windows
Steps to Proceed
Export the CA cert from Burp, and save the file as cacert.der
then type the commands
openssl x509 -inform DER -in cacert.der -out cacert.pemWe will use openssl to convert the der file to pem, generate a self-signed certificate, then move the file to Emulator's and install it.
openssl x509 -inform PEM -subject_hash_old -in cacert.pem | head -1You will get a hash. Now you have to rename the perm file with this hash.0
mv cacert.pem 9a5ba575.0
It requires root to move the certificate to /system/etc/security/cacerts
For that, we will log in to adb as the root
adb root
then
adb remount
now open adb shell, goto sdcard
cd sdcard
Now move the file to /system/etc/security/cacerts
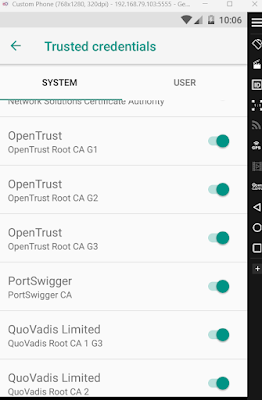
mv 9a5ba575.0 /system/etc/security/cacerts/Now, In the device Settings, Security, Encryption, and Trusted Credentials, you will see PortSwigger's CA certificate.
Conclusion
Android application penetration testing is a broader topic and cannot be covered in a single blog post, and we have to discuss many android pentesting frameworks. We will be publishing several blog posts to cover all of them.

